This is part two of Self Hosting an Azure Web Server blog. The journey will continue first with setting up a private github repository for version control and website backup. DNS will be integrated tying together the domain main and server IP address. TLS will be implemented enabling HTTPS. Various system hardening configurations and techniques will be implemented and the web site code will be edited and published.
Website Backup Repository with Git
To back up the website and create a version control system, I created a private github repository called securitykartoshka.com. That way I will always have a copy of the website in case I need to move my hosting services or experience data loss.
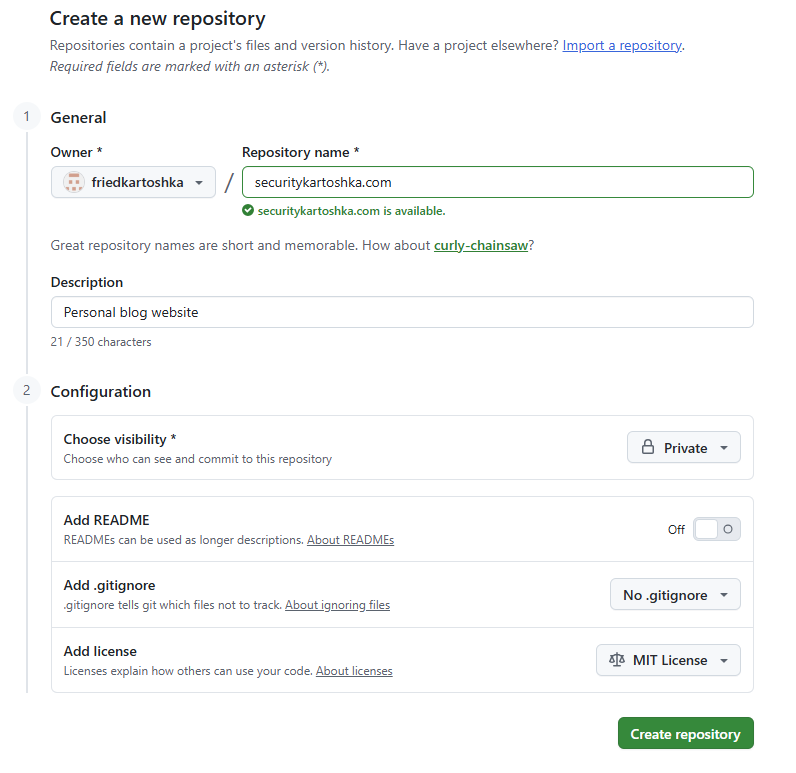 Repository creation for securitykartoshka.com.
I've downloaded the Bootstrap template file, unzipped the contents, and uploaded those files to my repository for the initial commit.
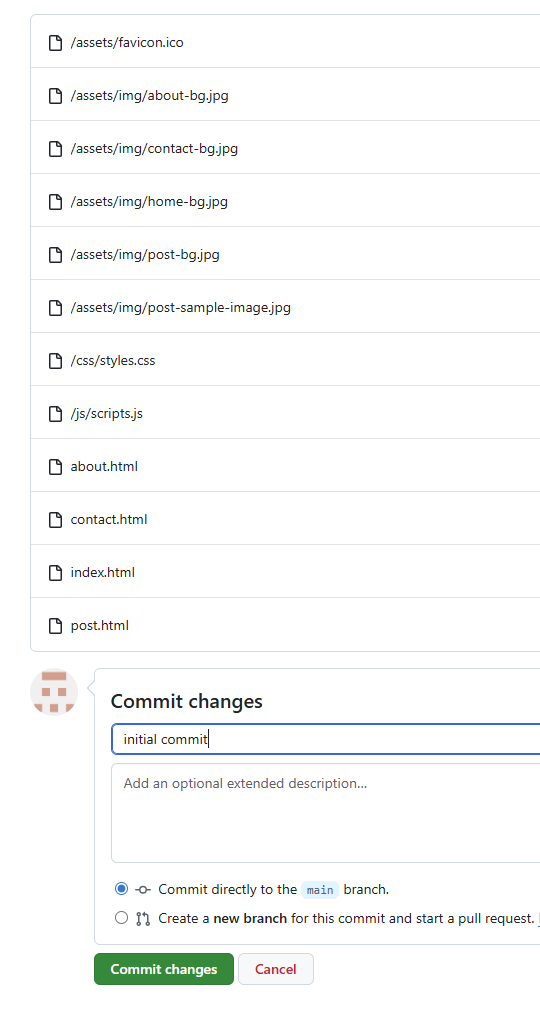 GitHub web app initial commit.
Transferring the website files to the web server will be accomplished using SCP. The server is headless (i.e., no GUI) and because SSH is already active this is the easiest and most secure option. The root Apache web server directory is /var/www/html. Like with SSH, the -i option specifies a private key path. The -r option recursively copies all the files at the source to the destination.
scp.exe -i .\kartoshkasrv.pem -r .\startbootstrap-clean-blog-gh-pages\startbootstrap-clean-blog-gh-pages mariia@20.106.202.118:/var/www/html/
However, the SCP command failed.
 Failed SCP file transfer.
To fix the SCP failure the permissions at /var/www/html must allow the mariia user to write to it. To do this, the chown command changes the owner of the directory to the mariia account and the group to www-data, which is the default user account and group for the Apache web server. Then the permissions of the /var/www/html directory will be modified (using chmod) giving mariia read/write/execute (RWX), www-data RX, and nothing for others. For files in the html directory mariia is granted RW, www-data R, and nothing for others. Collectively this ensures that the mariia user can add or edit website content and that the Apache www-data group can only read it. Should the web server get compromised, www-data will have minimal permissions.
This shows the permissions of the directory and files before and after the modifications where everything is owned by the root user and group.
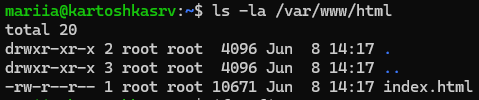 Directory and file permissions premodification.
                            sudo chown -R mariia:www-data /var/www/html

                            sudo find /var/www/html -type d -exec chmod 750 {} \;

                            sudo find /var/www/html -type f -exec chmod 640 {} \;
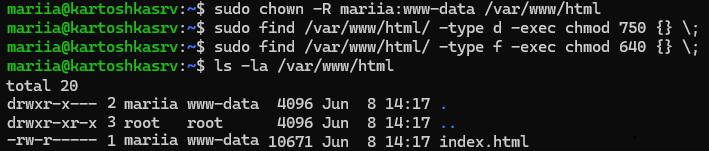 Directory and file permissions post modification.
After running the commands the current html directory (designated by .) shows user mariia has RWX and the www-data group has RX. A file within that directory (index.html) shows user mariia has RW permissions and the www-data group only has R.
Trying the SCP command again.
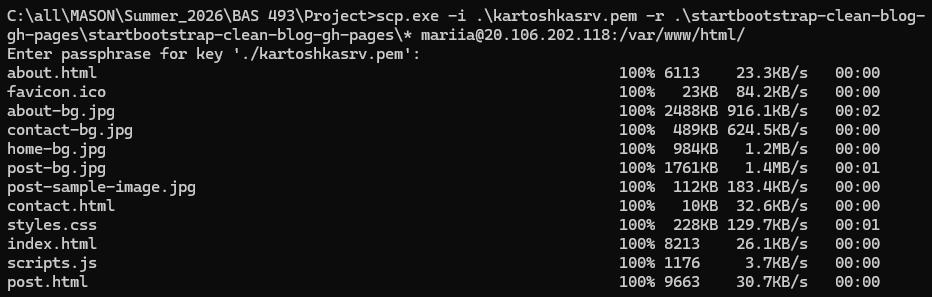 Successful SCP file transfer.
This is confirmed by viewing the template website content as it was successfully served at the known server IP address.
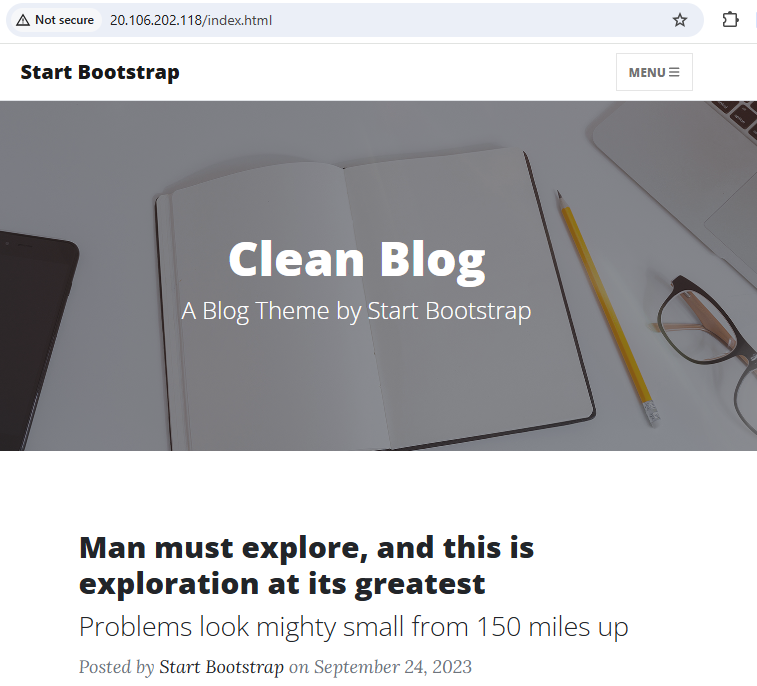 The template Bootstrap code being served on the internet.
DNS Configuration
The purchased domain name must be linked to the web server IP via DNS. To do this the DNS records can be edited at the GoDaddy registrar using the provided web management portal.
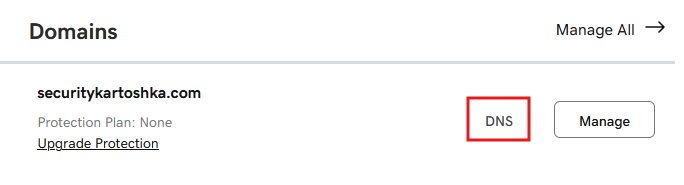 GoDaddy DNS management.
The DNS A record is used to map the domain name to the server IPv4 address. I set it with a time to live (TTL) of one hour. This is the amount of time a DNS resolver will cache the A record before it would perform a new recursive DNS query.
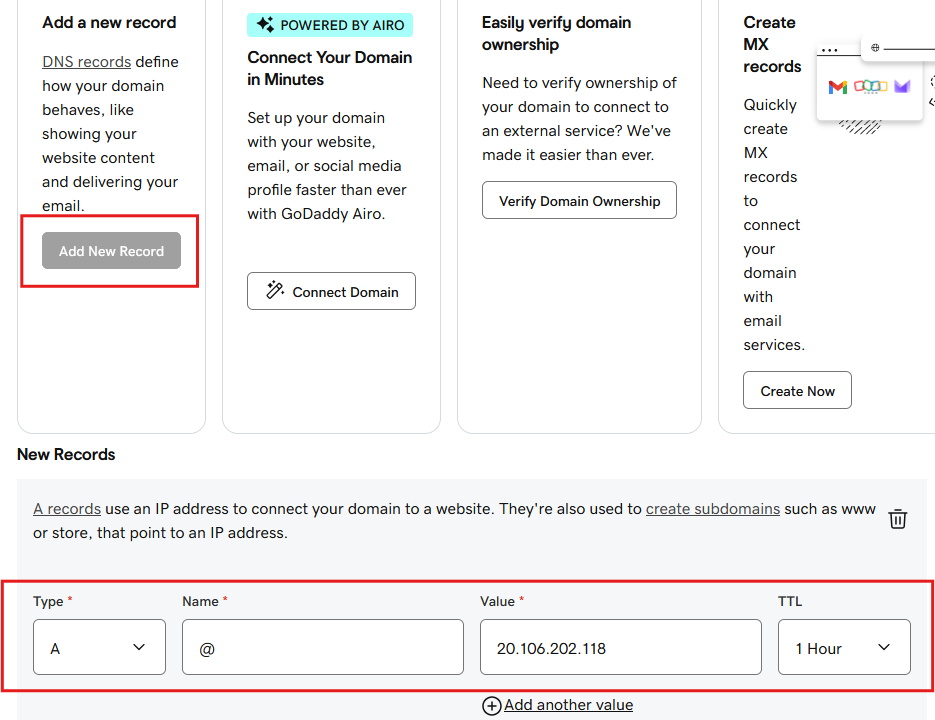 DNS A record creation.
I also added a canonical name (or CNAME) record for the www subdomain. A CNAME record is an alias name and in this case ensures that if a user goes to www.securitykartoshka.com it is equivalent (or technically redirected) to going to securitykartoshka.com.
 www CNAME record creation.
Local Git Integration
At the beginning of this post a GitHub repository for the website was created. However, I want to be able to edit and work on it locally to pull the latest branch or push new commits. I have git installed locally and I configured the global name and email settings. This is needed for working with git to access the private repo and committing changes.
git config -global user.name "friedkartoshka"

                        git config -global user.email "------------@gmail.com"
 Global git user and email configuration.
For remote access to GitHub they require the usage of a personal access token. I generated this token on my GitHub account that can be used for authentication with my local git instance.
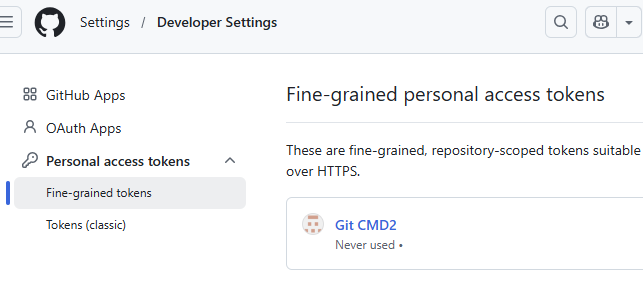 GitHub fine-grained token creation.
The template website files I uploaded to the web server and to the GitHub repository were the same with no edits. Moving forward I will only edit my website content from the git repository. To have a local working copy I cloned the repository. This is a private repo so only someone with access to my GitHub account can clone this.
git clone https://github.com/friendkartoshka/securitykartoshka.com.git
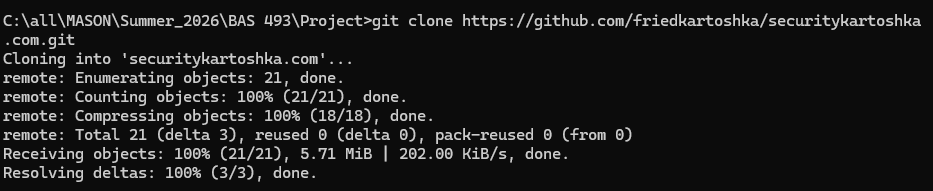 Cloning the private securitykartoshka.com GitHub repository.
TLS Time - Enabling HTTPS
To add HTTPS support to my website, I'll install a free TLS certificate from the Electronic Frontier Foundation (EFF) Let's Encrypt project. These certificates renew every 90 days and they have a utility called Certbot that when setup, automatically requests a Let's Encrypt certificate for my domain. It also renews the certificate as necessary. It uses Ubuntu's snap package management system.
I need to edit the /etc/apache2/sites-available/000-default.conf file's default VirtualHost config by adding a ServerName and ServerAlias.
                            ServerName securitykartoshka.com

                            ServerAlias www.securitykartoshka.com
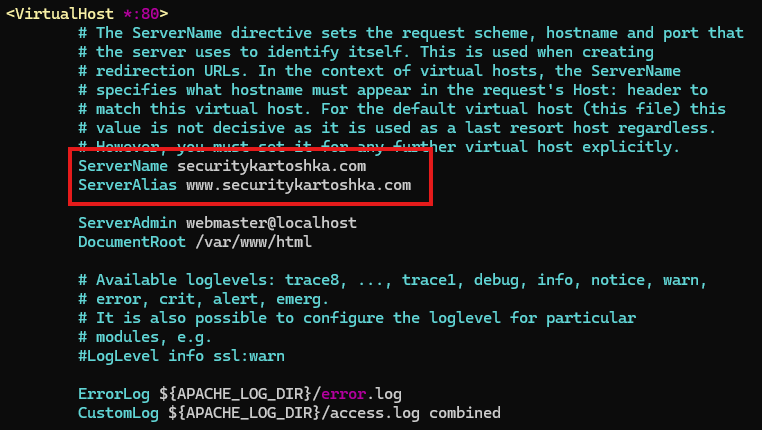 Editing the 000-default.conf VirtualHost config for Certbot.
Installation guidance said to first ensure that no existing Certbot packages exist on Ubuntu because snap will be used.
sudo apt remove certbot
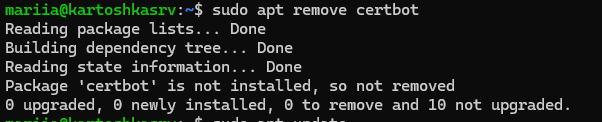 Confirming Certbot has no prior installations.
Now it's time to install Certbot using snap, not apt. After that the creation of a symbolic link that points /usr/local/bin/certbot to the actual Certbot binary located in /snap/bin/certbot is required. This ensures the certbot executable is in my user account $PATH and has the permission to run.
                            sudo snap install --classic certbot

                            sudo ln -s /snap/bin/certbot /usr/local/bin/certbot
 Installing Certbot via snap.
Getting and installing the certificate, plus editing the Apache configuration was next to enable HTTPS support. This was a longer dialog with multiple steps (plus I had to quit and start over once) so no long screenshot for this one. However, here's the command to kick off the process.
sudo certbot --apache
Certbot has the --dry-run option to test and ensure that the Certbot automatic certificate renewal function is working. Certificate renewal is set as a cron job (which is like a scheduled task on Windows).
sudo certbot renew --dry-run
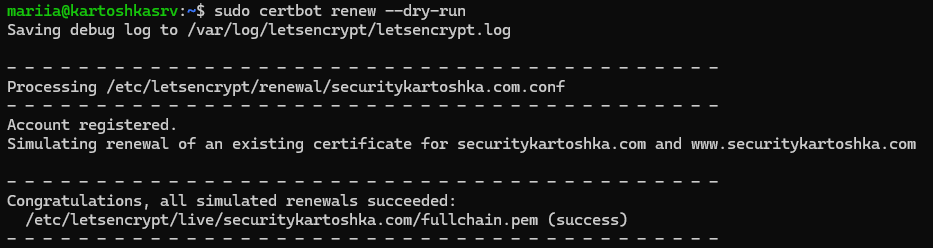 Simulating Let's Encrypt TLS certificate renewal.
Going to https://securitykartoshka.com confirms that HTTPS is active. It can't be pictured, but I also confirmed that going to http://securitykartoshka.com redirects to HTTPS. Both of these were confirmed for the www subdomain as well.
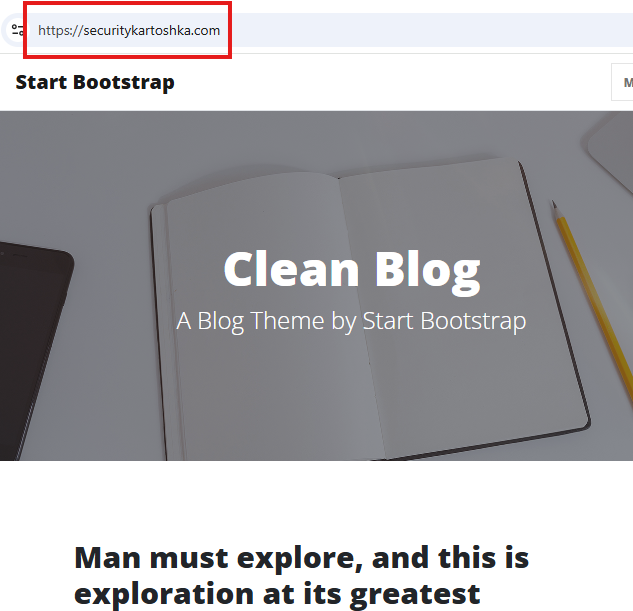 HTTPS is active.
In Chrome you can see that the site has a secure connection and that the certificate if valid. Viewing the certificate details also shows it was issued by Let's Encrypt.
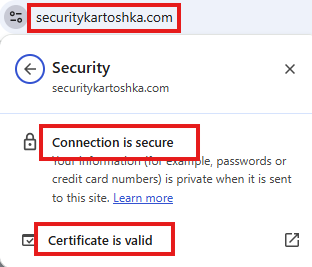
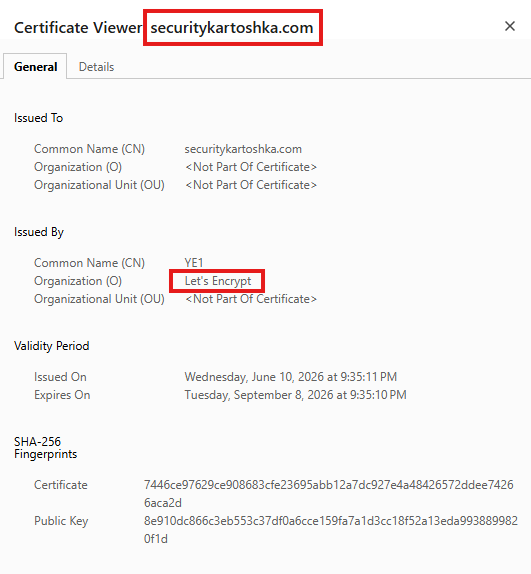 Viewing and confirming certificate details.
Configuration Hardening
Ubuntu server should have automatic updates enabled by default. However, I want to confirm this by making sure the unattended-upgrades package is installed. It was already installed so no new actions were taken.
sudo apt install unattended-upgrades
 Confirming the unattended-upgrades package is installed.
By default the unattended-upgrades package installs security updates and the related dependencies. It doesn't install new versions, features, or other unessential patches. However, I want the server to update all software regularly as it will not be regularly managed. To activate this a line in the /etc/apt/apt.conf.d/50unattended-upgrades file has to be uncommented in the Allow-Origins section.
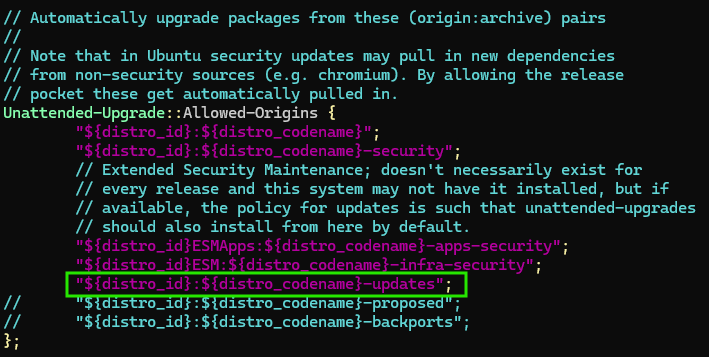 Enabling all unattended software upgrades
The operating system and Apache version information returned by the server can be restricted. To do this, I modified the /etc/apache2/conf-available/security.conf file and changed the ServerTokens and ServerSignature variables.
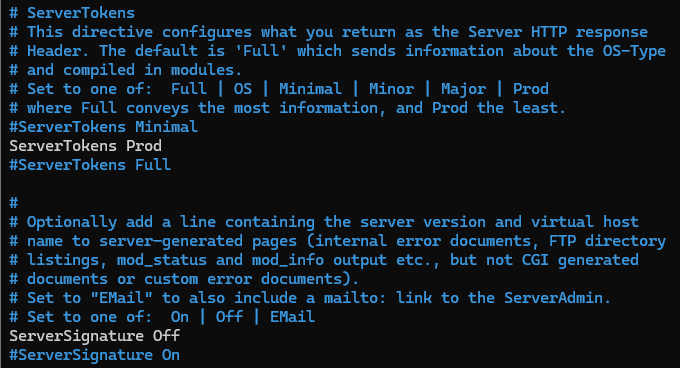 Editing the Apache security.conf SeverTokens and ServerSignature settings.
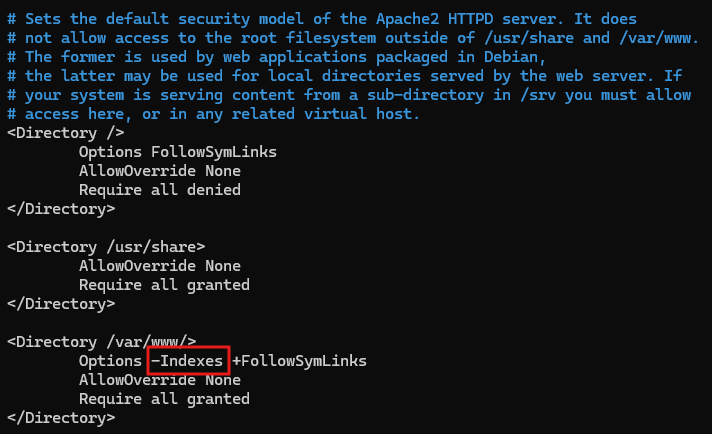
I also want to restrict directory browsing so users cannot view the web server root directory files. This requires changing the /etc/apache2/apache2.conf file and adding a minus sign (-) in front of the Index option.
PHP configuration hardening is controlled in the /etc/php/8.3/apache2/php.ini file. This includes the suppression of PHP display errors (display_errors) to the user, logging PHP errors (log_errors), and ensuring dangerous PHP functions are disabled (disable_functions).
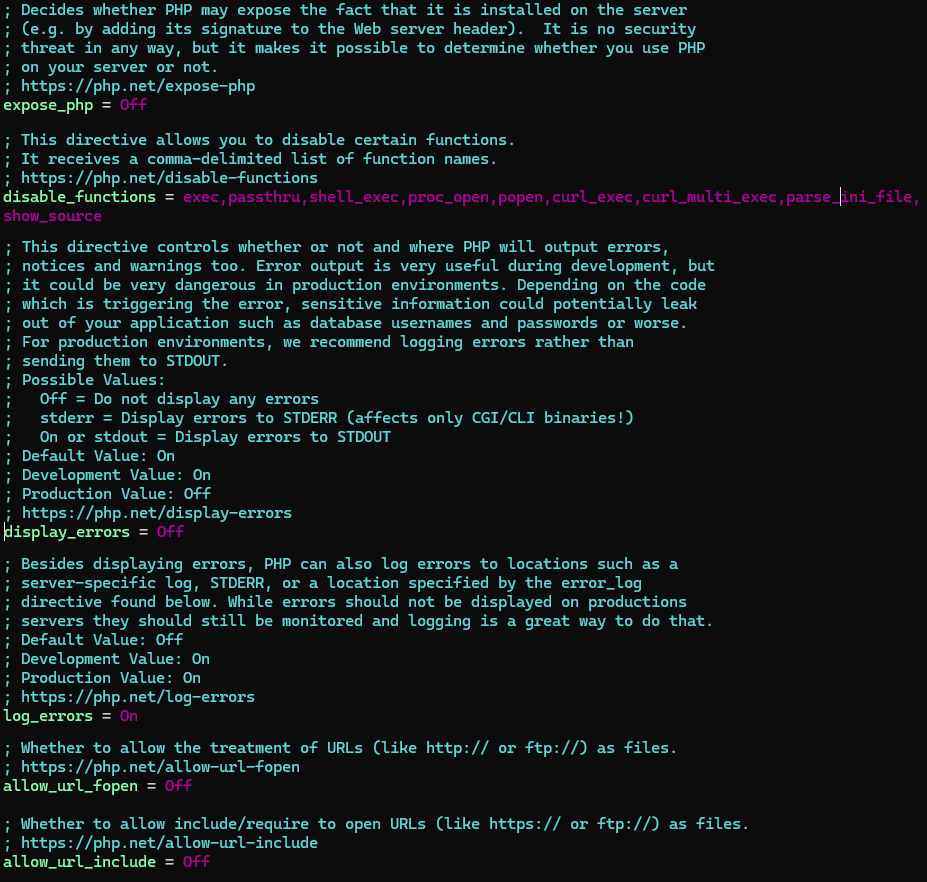 PHP configuration hardening.
Hardening SSH requires configuration setting changes to the /etc/ssh/sshd_config file. This included the restriction of the root account login, no password and only public key authentication, no empty passwords, and disabling X11 forwarding.
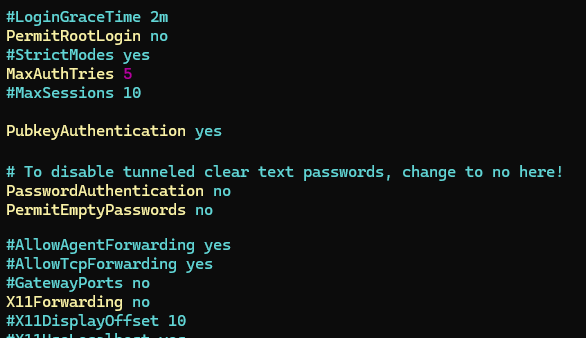 SSH configuration hardening.
The SSH service has to be restarted for the changes to take effect. It's also advised that after doing this to open a new shell and attempt another simultaneous SSH connection. This tests to ensure the changes don't lock you out. If a problem is encountered, you still have your existing active session to make config adjustments ensuring continued system access.
sudo systemctl restart ssh.service
The fail2ban program will also be installed. This helps prevent brute force attacks and things like bots trying to access publicly exposed SSH.
sudo apt install fail2ban
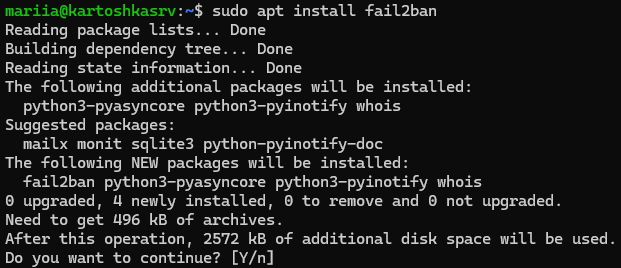 fail2ban apt installation.
fail2ban works on the concept of jails. If a given IP address violates the designated rules it gets added to the related jail (i.e., blocked). The fail2ban SSH jail settings will be implemented to allow a maximum number of authentication retries of five. If a failure happens for a given IP five times (over a 10-minute window by default) then it will be blocked for an hour (3600 seconds) before it can try again. The 10-minute window can be adjusted by adding a findtime = parameter to the config. The recommended guidance is to not edit the default jail configuration file /etc/fail2ban/jail.d/defaults-debian.conf as this can be overwritten with future apt package manager fail2ban updates. Instead, the use of .local files should be used. I'll create sshd.local in the jail.d directory.
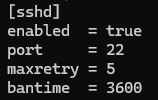 fail2ban SSH jail configuration.
The fail2ban service must be restarted for these changes to take effect. As with the SSH config changes, I'll open a second shell and ensure I still have remote SSH access with the new fail2ban settings prior to performing other tasks.
sudo systemctl restart fail2ban.service
I could also change the default SSH port from 22 to something else. This would need to be coordinated in the SSH config file, the Azure VM network settings, and for fail2ban. This would provide a little security by obscurity by reducing the scan noise from bots, etc. that may only try the top common internet-exposed ports. For instance, if you run the SYN (-sS) scan in nmap, it defaults to using the top 1000 most common TCP ports unless you add other scan options. However, this is something I'll consider at a later point.
Website Authoring
At least for now, my cloud VM server is complete. Now it's time to actually build the website content. This is primarily HTML and a little CSS as of now that I'm actually coding. I did add PHP capability and at a later point may include some code for that as well. After formatting the website in general and working on the first blog post (including adding images) I wanted to save and commit these changes to my GitHub repo. I first check the status of these changes using the git status command. These show me any files that have changed since the last commit.
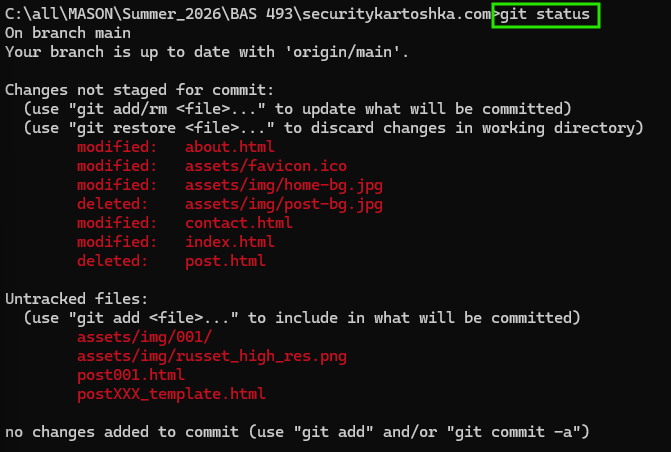 git status
I'm happy with that so I stage the changes using the git add and and then commit the changes to the repository by, unsurprisingly, using the git commit command. The -m allows me to add a comment about the commit being made.
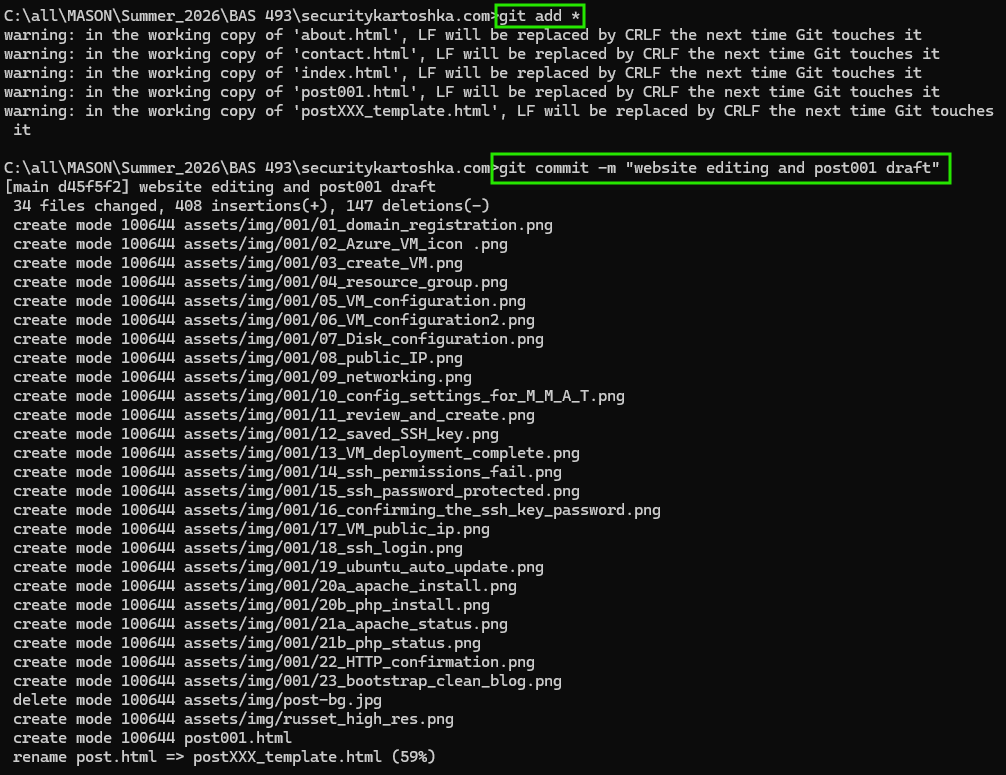 git add and git commit
After doing this the changes are only on my local system. My remote GitHub repository has no record of these changes. To sync them I can upload these changes, including the addition/deletion of any files, using the git push commmand. The effectively backs up my website to a cloud resource. Regardless of what happens to my cloud VM or local system, I'll be able to recover my site content in full. All I'd have to do is clone the repo and then copy it to a new web server's root directory (/var/www/html/ for Apache).
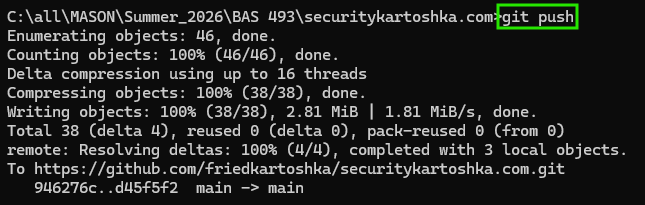 git push
Git takes care of version control and backup but none of the new files or file changes are on my web server. To actually make the changes active they have to be copied. As before, SCP is the tool for this. Since this is the initial deployment of the site, various files have been edited in various directories for several differnt SCP commands were used to upload everything. The first upload is all of the blog post 1 image files that need to be saved at /var/www/html/assets/img/001.
scp.exe -i ..\kartoshkasrv.pem -r .\assets\img\001 mariia@20.106.202.118:/var/www/html/assets/img/
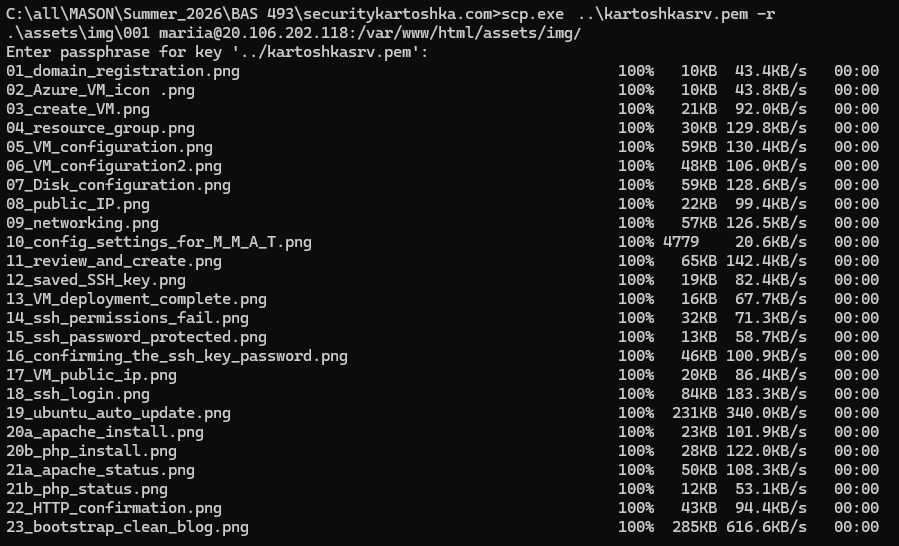 Blog post 1 image file upload.
A few other images for the site are uploaded.
scp.exe -i ..\..\..\kartoshkasrv.pem home-bg.jpg russet_high_res.png mariia@20.106.202.118:/var/www/html/assets/img
 Other image files upload.
The favicon.ico file is uploaded. This is the small icon displayed next to the site title on a browser tab.
scp.exe -i ..\..\kartoshkasrv.pem favicon.ico mariia@20.106.202.118:/var/www/html/assets/
 favicon.ico file upload.
All the HTML web content is uploaded. Most of this are the initial edits of core files as well as the first blog post entry in post001.html.
scp.exe -i ..\kartoshkasrv.pem about.html contact.html index.html post001.html postXXX_template.html mariia@20.106.202.118:/var/www/html/
 HTML document uploads.
Finally the website edits can be confirmed by browsing to securitykartoshka.com over the internet. The index.html is the default file server on the site homepage.
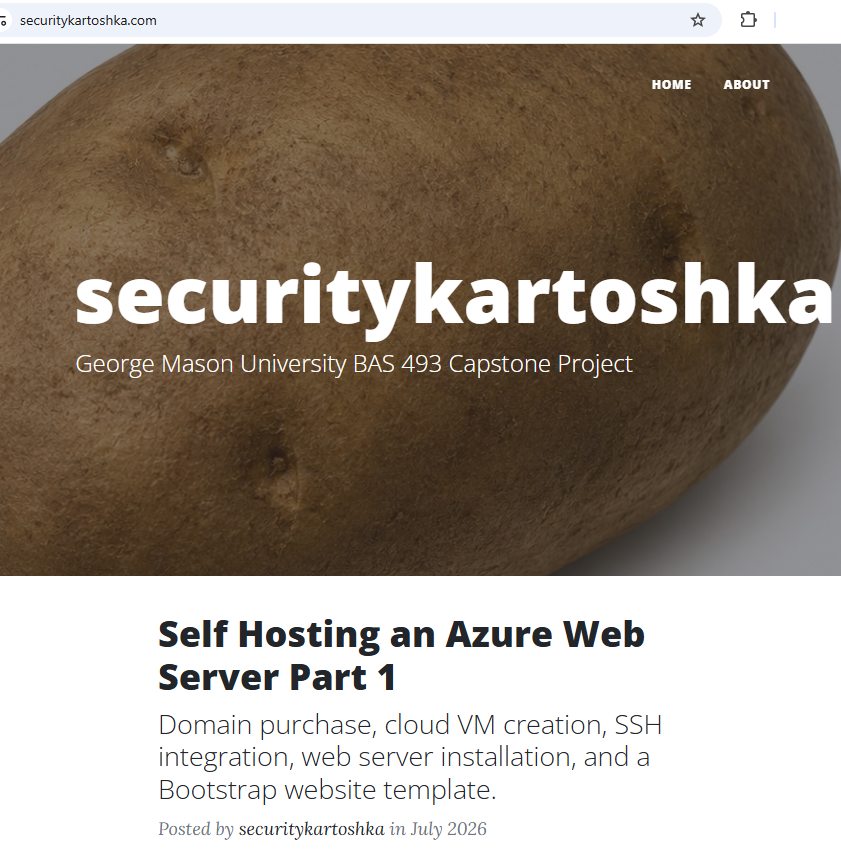 The edited securitykartoshka.com homepage index.html is up and running.
Cost
Looking at the cost of running my server for about a month using the standard B2ts v2 virtual machine in East (US) zone, it was $15.57. That's more than double what one might assume based on the original VM pricing of $7.59/month. One must also take into account storage costs and network related things such as my need for a public static IP.
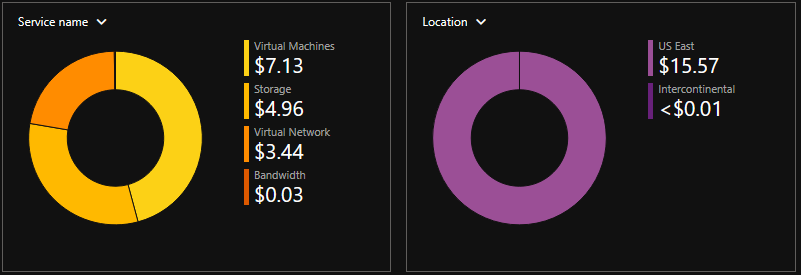 Azure VM hosting costs.