The creation of this blog is the basis of my BAS 493 Capstone project. It's my final course to complete the Bachelor of Applied Science (BAS) in Cybersecurity degree at George Mason University. In this two part blog I self-host a web server deployed in the Microsoft Azure cloud environment. It will document the entire process including all tools used, configuration changes, and the creation of the website content. A variety of technologies and protocols are used including DNS, HTTP, TLS, SSH, SCP, git, and various Linux programs and commands. I will also provide a cost overview of the cloud services needed to self-host my server.
Domain Purchase
I purchased a domain for my website. The registrar I used was GoDaddy. I wanted to purchase securitypotato.com, but it was unavailable. As an alternative, I chose the Russian word for potato, kartoshka (картошка).
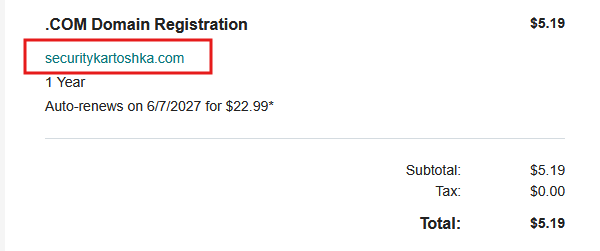 Purchasing a domain.
Cloud Virtual Machine (VM) Creation
A Cloud Service Provider (CSP) was required to host my server. The approach I'm taking for self-hosting is Infrastructure as a Service (IaaS). I'll be managing everything from the operating system to all the application software. The big three CSPs are Microsoft Azure, Amazon Web Services (AWS), and Google Cloud Platform (GCP). I'd also consider Digital Ocean as a hosting provider but since I have some Azure credits I went with them.
The first step for self hosting in Azure is to go to the virtual machine (VM) services section.
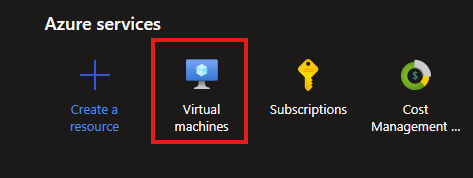 Azure VM services.
Within VM services, I can create a new VM.
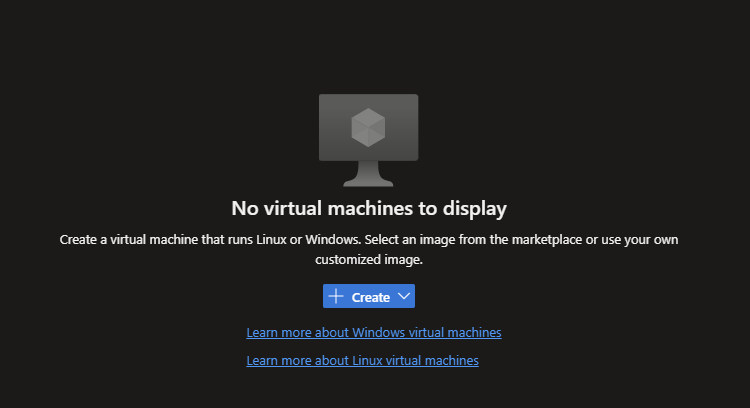 Creating an Azure VM.
Azure requires a resource group to act as a container to house the various components for the cloud VM. My resource group was named BAS_493.
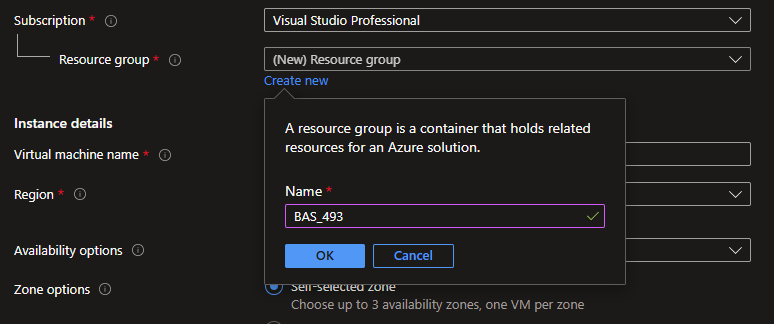 BAS_493 resource group
I named the VM kartoshkasrv, I chose the East US region and selected the Ubuntu Server 24.04 operating system with the x86_64 CPU architecture. I went with an inexpensive Standard B2ts v2 VM with only 1 GB of RAM. The web server will host basic static content like text and images and doesn't require many resources. Let's be honest too, I don't expect much traffic to my site either.
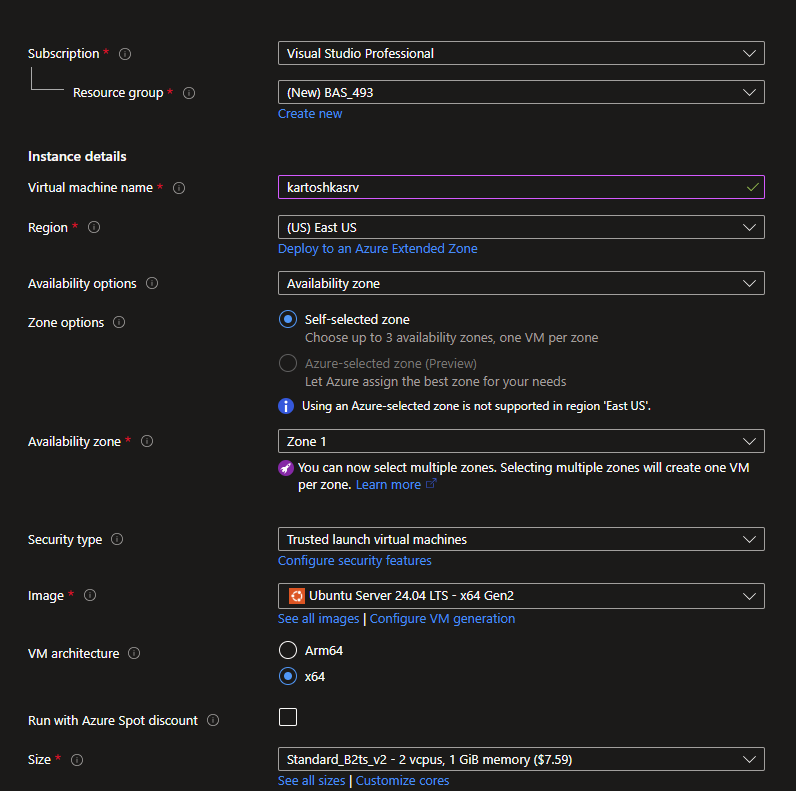 Sever name, region, OS, and resources selection.
For more secure remote access I created a SSH public/private key pair instead of using a username and password. The SSH private key is critical to protect because anyone who has it can remotely connect to my VM. I have also opened several well-known TCP ports: HTTP (80), HTTPS (443), and SSH (22), so my web server is accessible and I have remote command line access via SSH. Lastly, I set the local server account name to mariia.
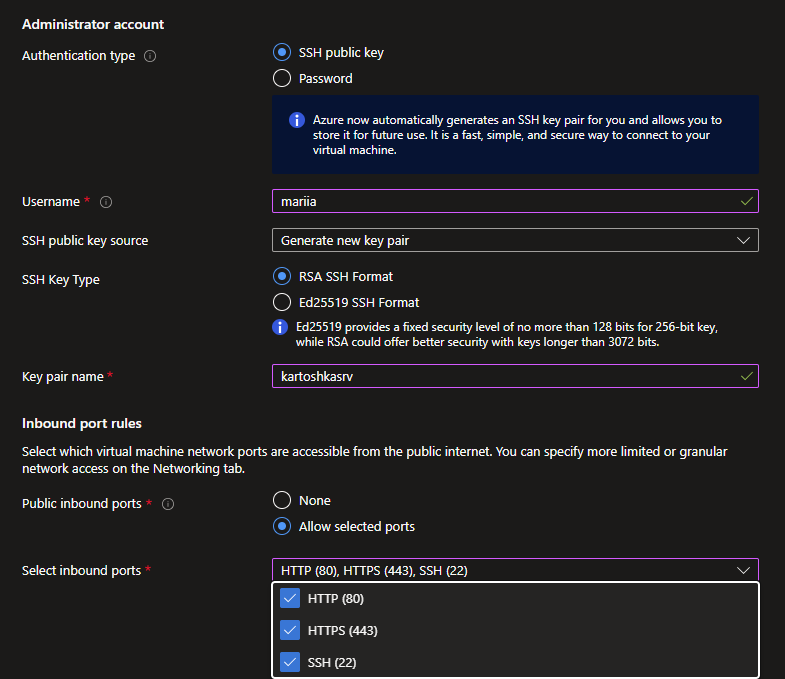 SSH certification selection and open network ports.
For the Disks section I went with the default configuration.
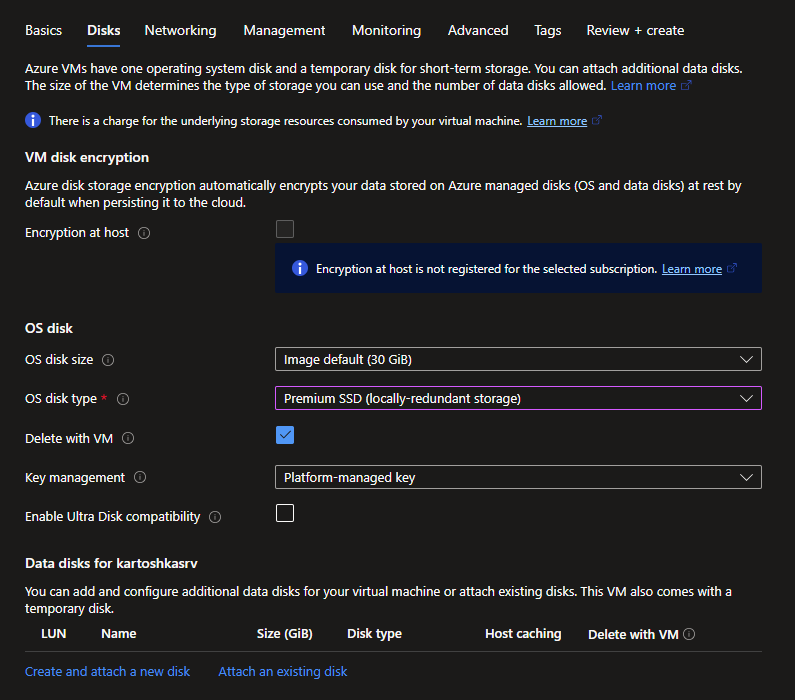 Default solid state disk (SSD) selection.
My VM must have a static public IP so my website is accessible from the internet. It will also be used to link my domain name to the web server using the Domain Name System (DNS).
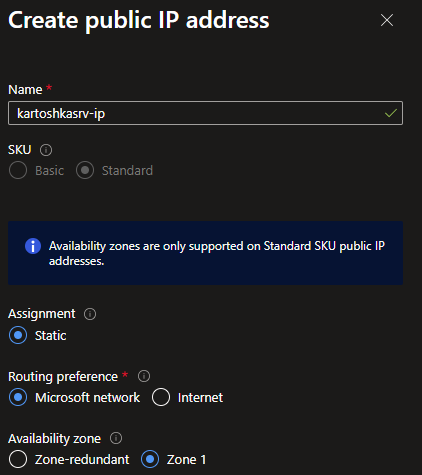 Static public IP selection.
For the rest of the Networking section, I went with the default settings. Of note, my internal subnet is 10.0.0.0/24, inbound ports are TCP 22, 80, 443, and I have no load balancing. I don't anticipate much (or any) traffic to my site, so load balancing is completely unnecessary.
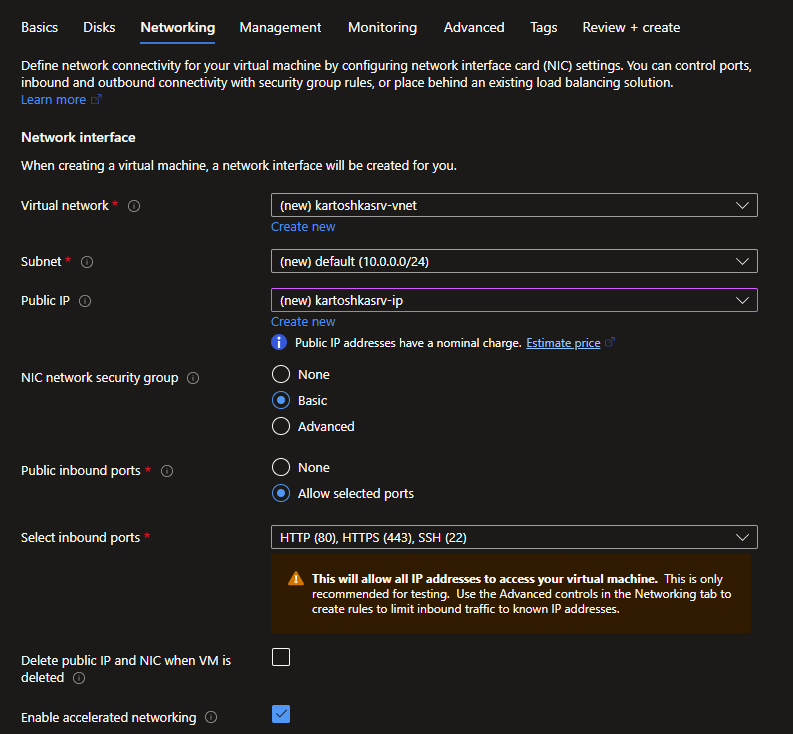 Networking section options.
After the Networking section I went with the default configuration settings for Management, Monitoring, Advanced, and Tags so I selected Review + create to finalize the VM creation.
 Going with the defaults for the rest of the VM options.
Things looked good so I created the VM by selecting... Create.
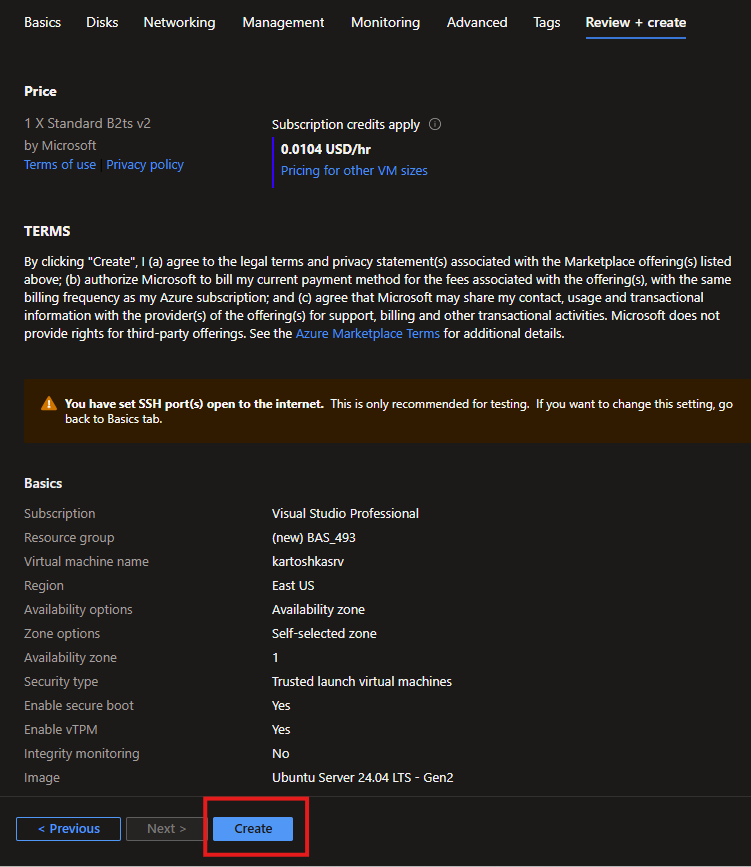 VM creation.
After creating the VM you have one opportunity to save the SSH key. This is critical that you do. This is the private key to access the web server so it must be protected. As of now, the key is not encrypted. Anyone with the .pem file can access my system. The downloaded file name is the same as the server name, kartoshkasrv.pem
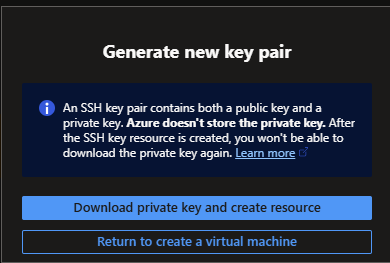 One opportunity to save the SSH private key.
The final VM deployment process is now complete!
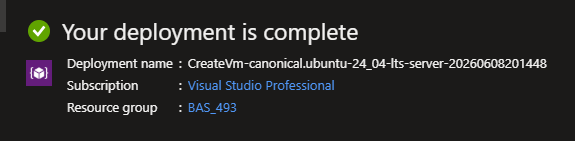 VM deployment completion.
SSH Integration
To secure the private key, I will password-protect it using the built-in ssh-keygen utility on my local Windows system. The -p option is used to set an encryption password and the -f option will specific the downloaded .pem private key file.
ssh-keygen -p -f .\kartoshkasrv.pem
However, this failed due to a permissions error. The .pem file has access that is too permissive for ssh-keygen's liking. To resolve this I ensured my current Windows local user account had Full Control. Then I removed the access for Authenticated Users and the built-in local Users group.
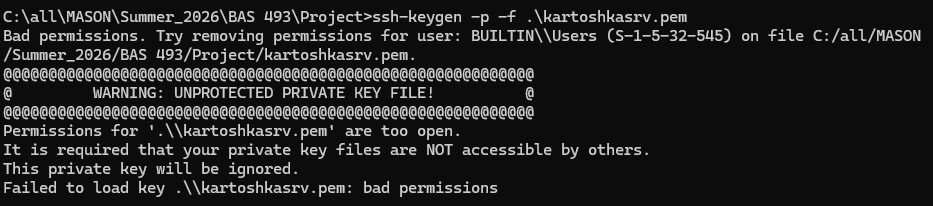 Failed key encryption due to broad file permission settings.
With this adjustment, rerunning the same ssh-keygen command again completed successfully.
 SSH key encryption success!
To confirm encryption password, I reran the ssh-keygen command but this time with the -y option. The output of this is the public key information. Expose of it doesn't pose a risk and the public key can be freely shared. I also backed up the private key and password to my password manager. If this private key file is stolen from my laptop, an attacker would also have to known or guess/bruteforce the password. Considering it's long and random, that's unlikely as known attacks today.
ssh-keygen -y -f .\kartoshkasrv.pem
 SSH key encrypted password confirmation.
To remotely access my VM, I need the public IP. This has been assigned by Azure and I can locate it on the Overview page of my VM under the Networking section.
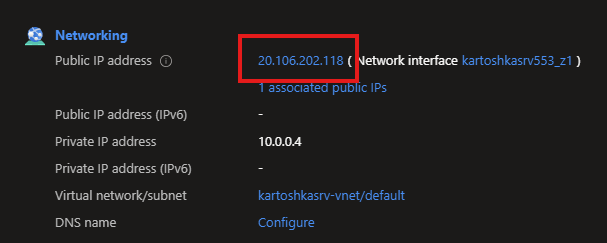 VM public IP address.
Server Setup
Armed with this information, plus the server account name mariia, I should be able to remotely access the server with SSH. The -i option designates the private key file for SSH to use. After connection the login banner indicates the OS version is Ubuntu 24.04.4 LTS. I also ran the whoami command confirming I am user mariia and then the hostname command confirming the server name is kartoshkasrv.
ssh.exe -i .\kartoshkasrv.pem mariia@20.106.202.118
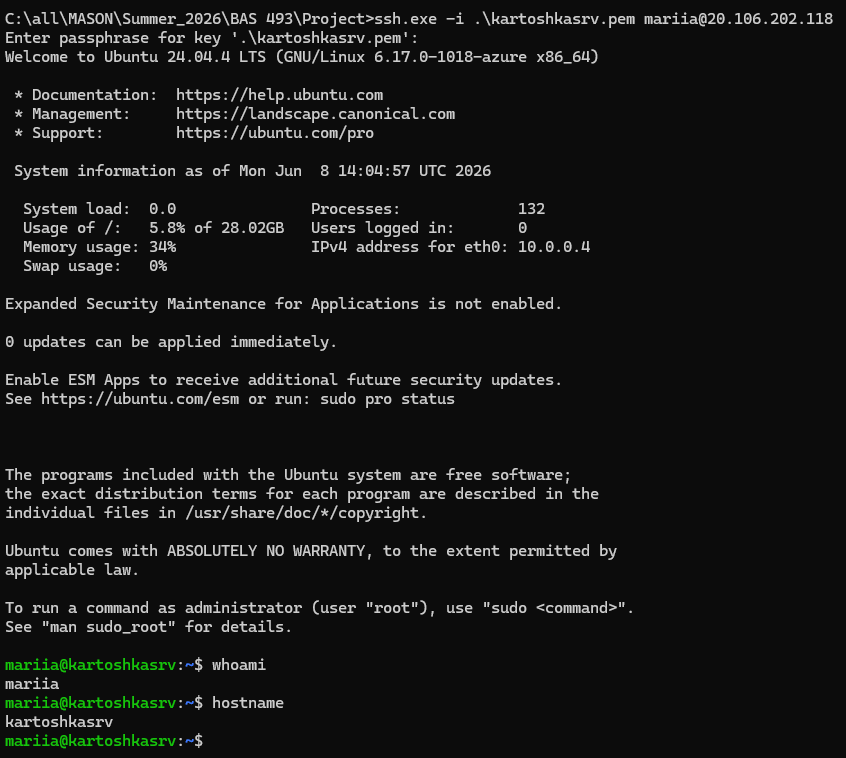 VM server remote login using SSH.
This is a new Ubuntu server install so it is important to ensure that it is fully patched. Ubuntu's apt package manager makes it easy with two simple commands. The apt update portion ensures the latest package repositories are used and the second distinct command (after the &&) apt dist-upgrade updates all components of the currently installed Ubuntu distribution.
sudo apt update && sudo apt dist-upgrade
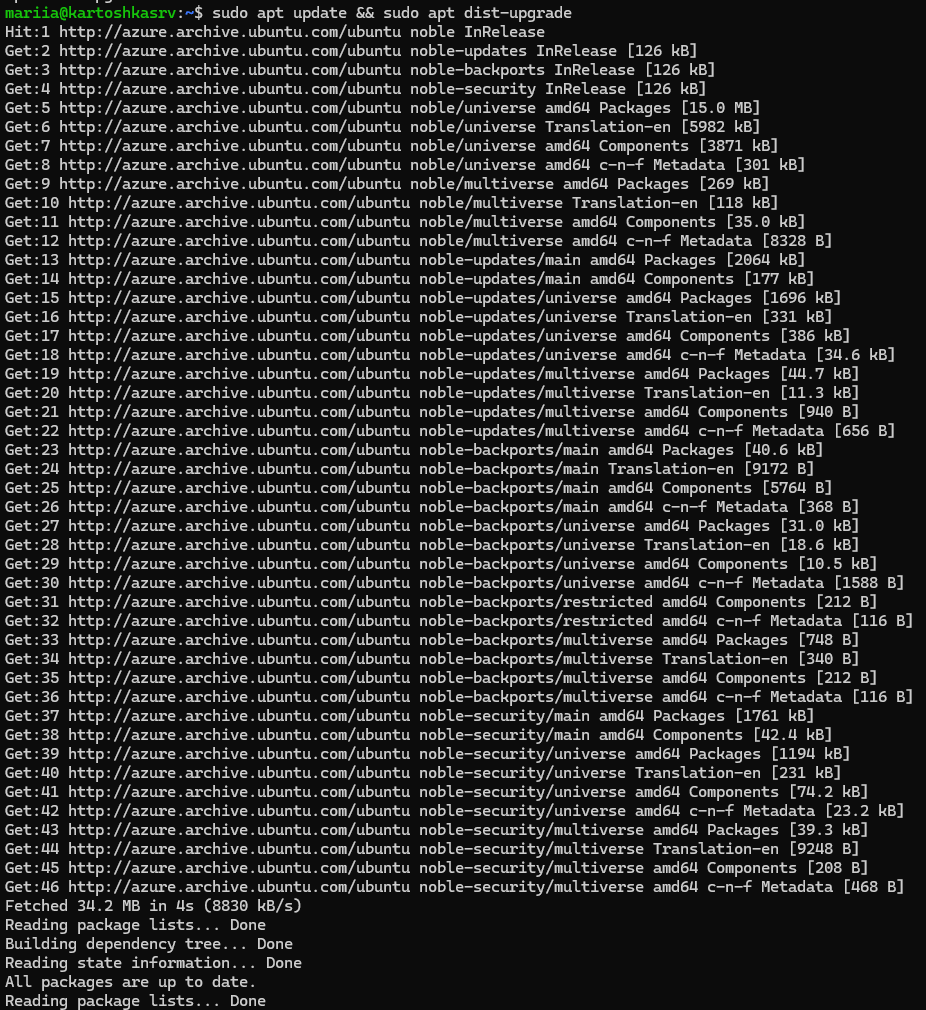 Ubuntu update.
Now that Ubuntu is updated, it's time to install the web server software. There are several popular options available like nginx and Microsoft Internet Information Services (IIS), but I am going to use Apache. Again, apt makes it simple.
sudo apt install apache2 -y
 Apache web server installation.
I will install PHP Apache support as well as I may implement some basic server-side scripting. There are many PHP plug-ins available too for MySQL, curl, XML, etc., but I will not add those at this time.
sudo apt install php libapache2-mod-php
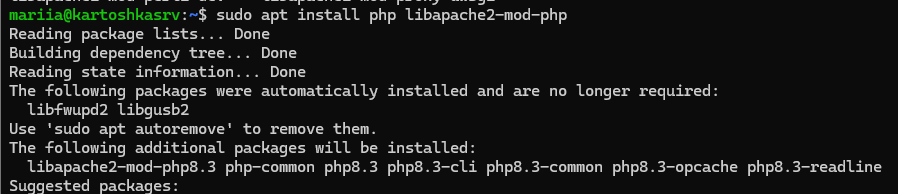 Apache PHP support installation.
It's a good idea to confirm the status anytime a new service is installed. Apache's status can be checked using the systemctl command.
sudo systemctl status apache2
Apache is running which means the installation automatically started the web service.
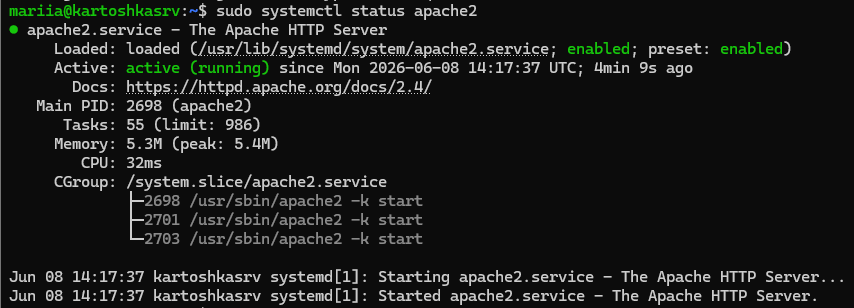 Apache service status.
I'll also verify that PHP was installed and restart the Apache service. Running apache2ctl with the -M option lists all installed Apache modules. Piping that output to grep php only displays a result with php in the string. If a result is returned it means it was found (and therefore installed). To ensure PHP is running, the Apache service is restated with the systemctl restart command.
                            apache2ctl -M | grep php

                            sudo systemctl restart apache2
 Confirming the PHP module installation.
Initial Website Setup
To confirm that my web server is internet accessible, I will browse to its public IP address using HTTP. My website has not implemented TLS certificates so it doesn't support HTTPS at this time.
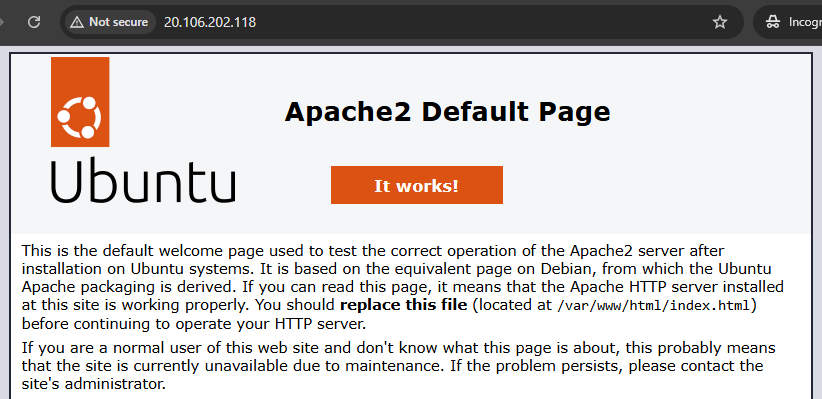 Apache web server is internet accessible.
 Bootstrap Clean Blog template.
This wraps up part one of the web sever build. In part two I'll cover web server configuration, the usage of git as a backup mechanism, DNS and TLS implementation, server hardening, and the authoring of this blog content.